- "Whether or not the vision is true, a conflict will come of this. We shall take steps to restore our friendship with Stratos." – Persephone, The Prophecy (Intermission)

Negotiating with Stratos' envoy.
- Mission Giver: Persephone
- Location: Surtur's Keep
- Map Creator: Scott Holty
- New Spell: Ethereal Form
- New Creature: Scarab
- Boon:
- Maximum Mana Level +15%
- Speed +15%
- Karma:
| ||||||||||||||||

Map of Surtur's Keep (full image)
Starting Setup[]
- An altar
- 6 souls
- 2 Manahoars, a Scarab, Lord Surtur and Thestor (if alive)
Objectives[]
Surtur is very hard to kill by level 1 and 2 creatures, so an occasional heal or having a Scarab guard him should be enough to keep him alive. But do be aware of enemy masses ganging up on him.
Don't try to win this mission quickly by rushing with Surtur to the gateway. You'll only get a message that you have to defeat Seerix first.
To find Seerix's altar simply follow the trail of her manaliths.
Walkthrough[]
- ELDRED: I began the trek to Surtur's Keep, the Stratos stronghold commanded by his champion Abraxus. Into this bastion of war, we were to carry a message of peace.
- MITHRAS: An ironic sight. The home of the storm giants sparked a war between Persephone and Stratos long ago.
The Keep[]
First of all, Surtur's Keep can be quite a confusing map to someone who hasn't played it before. It consists of two islands connected by a gateway which, for the greater part of this mission, is inactive. So if you see a bunch of mana founts and possibly Abraxus's altar somewhere in the distance that you can't reach, don't be mislead - they will take no part in this mission. You can teleport to Abraxus's altar, however there's no reason to do so, particularly if you're aiming to receive this mission's boon.
The story behind this mission is that Persephone wants to find an ally. She uses Surtur's release as a way of sending a proposition of alliance to Stratos.
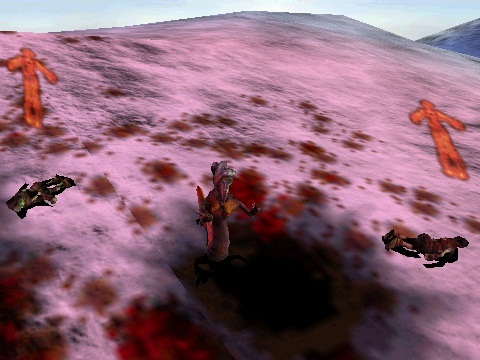
"There is no escape!"
Seerix[]
You should start by building a manalith and raising an army with the souls you are given. Little farther from your altar you'll see a Charnel manalith and a scene of carnage. Getting closer will result in activating a cinematic. If you're not playing for the story or have seen the cinematic before, you should skip it. It'll save you a soul which Seerix, one of Charnel's wizards, starts to convert during the cinematic (however if you don't skip it Seerix goes far away from the carnage scene so it could be easier to convert the remaining souls). Send Surtur or some melee creatures to destroy the manalith, so that later Seerix can't resurrect at it. Near the dead Peasants (not Snowmen!) there are some Fallen playing dead (typical Charnel strategy). After you kill them Seerix will come to collect them so it would be advisable to build some creatures that are good at killing wizards beforehand. She will also have a Deadeye with her. After she is dead and her manalith is destroyed (and presumably your own built), you'll be able to convert most of the souls.
High Ground[]
Continue onwards and you'll find a row of Charnel's level 1 creatures and a Netherfiend. Even though at first glance they don't belong to Seerix' side, she can still collect them if they are dead, so kill them when she isn't around. If you manage to do that the rest of this mission should be relatively easy. There are some manaliths across the map with creatures guardianed to them, but Surtur alone should be enough to take care of them. At the manalith closest to her altar there will be another Deadeye. After that all there is left to do is to desecrate her altar.
Boon[]
The boon benefactor for this mission is Stratos. He gives you the boon if you banish Seerix within 18 minutes since the game starts. He then compliments you on your speed and recommends you to serve him instead of Persephone.
18 minutes is more than enough to defeat Seerix, but still if you want to be extra sure you get the boon set a timer (and don't mope around).
There is no karma boost for this boon.
| Previous Mission: | Mission Category: | Next Mission: |
| Persephone's Missions | IM-03 |
| Missions in Sacrifice | |||||||||
| Missions | 1 | 2 | 3 | 4 | 5 | 6 | 7 | 8 | 9 |
| Persephone | PE-1 | PE-2 | PE-3 | PE-4 | PE-5 | PE-6 | PE-7 | PE-8 | PE-9 |
| James | JA-1 | JA-2 | JA-3 | JA-4 | JA-5 | JA-6 | JA-7 | JA-8 | JA-9 |
| Stratos | ST-1 | ST-2 | ST-3 | ST-4 | ST-5 | ST-6 | ST-7 | ST-8 | ST-9 |
| Pyro | PY-1 | PY-2 | PY-3 | PY-4 | PY-5 | PY-6 | PY-7 | PY-8 | PY-9 |
| Charnel | CH-1 | CH-2 | CH-3 | CH-4 | CH-5 | CH-6 | CH-7 | CH-8 | CH-9 |
| Intermissions | IM-1 | IM-2 | IM-3 | IM-4 | IM-5 | IM-6 | IM-7 | IM-8 | IM-9 |
| Others | Prologue | The Wanderer's Tale | Respite | The Crucible | ||||||||