Upload the image here and immediately change the image description parameter. |
- "We can't afford to let up. It's time we put an end to Pyro's reign of terror. Break his power once and for all." – James, Desperate Measures (Intermission)
- Mission Giver: James
- Location: Helios
- Map Creator: Scott Holty
- New Spell: Wall of Spikes
- New Creature: Boulderdash
- Boon:
- Maximum Health Level +15%
- Magical Damage Resistance +10
- Karma:
| ||||||||||||||||

Map of Helios (full image)
Starting Setup[]
Objectives[]
Walkthrough[]
- ELDRED: Cindercrag was but a short distance from Pyro's home of Helios. I hurried to face him there, before his sorcerers fully recovered from their recent defeats.
- ZYZYX: But in Helios, there'd be no help from James. In one god's home the others cannot interfere.
Sorcha[]
You arrive at Helios, the capital of Pyroborea, and James instructs you to end "Pyro's reign of terror" by desecrating his ultimate altar. Pyro will taunt you for a while, then will send Empress Sorcha to attack you. Your other opponent, Ambassador Buta, is content to sit near the ultimate altar for the time being (his AI being turned off); don't worry about him.
The gnome Faestus will approach you. In a cowardly fashion, he switches allegiance to your side right away, and tells you about the Magnifryers. He will fight on your side from now on, even during later missions.
Sorcha attacks from your right; she has a fortified manalith nearby, and is accompanied by a Warmonger and a few Pyromaniacs in addition to the creatures she summons. To maximize the amount of souls you can get from her, try not to attack this fortified manalith, as she may reclaim them. Instead, just build a manalith on the empty Mana Fountain just ahead of you, and wait for Sorcha to attack. The best way to deal with her is to use a combination of your spells and a few Boulderdashes to kill her quickly, or failing that, to kill her Warmonger before it can devastate your army. Gammel (if alive) can help by gluing Sorcha, leaving her almost immobilized and at the mercy of your Boulderdashes. Once Sorcha dies, her army will retreat (if there is anything left).
Convert all that you can quickly before Sorcha returns; use your Wall of Spikes to buy time if needed, though if Sorcha had lost all her souls during her last offensive she may not even try to reclaim them, and will instead travel off to capture manaliths. Either way, as soon as she no longer has enough units to mount a decent offensive, or as soon as she stops attacking, make your way to her altar. Two Bombards defend it; being snipers your Boulderdashes will outrange them, but a sped-up Gammel will also dispose of them quickly, and he's tough enough to withstand a few of their bombs. Construct a manalith of your own (your mana income is probably very low at this point as your other manaliths are far away; feel free to summon a few more manahoars, soon you'll be swimming in souls) and desecrate her altar. She will likely be far away, and will hurry back to her altar; Boulderdashes will pick her off from a distance, Wall of Spikes will slow her down and Gammel's Stickbomb will stop her in her tracks, so she will fall quickly.
Once Sorcha's altar is gone, the creatures guarding her other manalith will keel over and die, letting you convert their souls. A total of 10 souls can be gained from here.
Buta[]
Needs an original version of the already existing image (level-specific). |
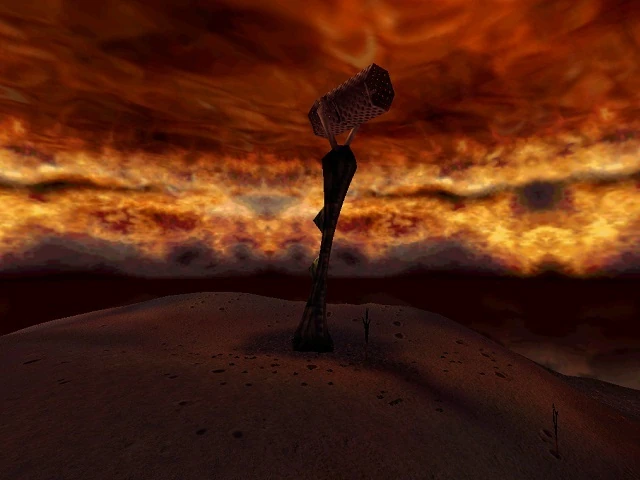
One of the Magnifryers
Feel free to build up near your own altar, as Buta's AI will not activate even when you banish Sorcha. Buta will only start moving if his property (e.g. one of his Magnifryers) is attacked or if you approach his Magnifryers personally. That being said, destroying the Magnifryers may be somewhat challenging. If you had served James during your first mission, all you need to do is to summon a few Troggs. Troggs are immune to the Magnifryers' attacks, which are magical in nature. If you can't summon Troggs, you can try summoning other level 1 melee creatures; a swarm of them can take out one Magnifryer before they all bite the dust. However, this will cause Buta to approach with his whole army (including a Warmonger) while most of your souls are on the battlefield, so try to gather them fast and return to the rest of your own army just as fast. A final option is to cast a shielding spell and quickly run up to the base of the Magnifryers, which they can't fire at, and summon a melee creature to destroy it, all the while hiding behind the pole of the Magnifryer from other Magnifryers; then run to the next one and so on, as quick as you can before Buta strikes.
Once the Magnifryers are down all you need to do is defeat Buta. He has a decent army, but they should fall to a Boulderdash battery. His altar is defended by two manaliths and their guardians, including a Phoenix. In addition, a group of Bombards, Warmongers and Pyromaniacs will emerge from behind Buta's altar and attack you as you approach. Massed Boulderdashes will get rid of all of these guards eventually, however, and all you need to do after that is to desecrate Buta's altar, which should be a piece of cake at this point.
With Pyro gone, James will explain the consequences of your actions, and so the mission is complete.
Boon[]
The boon benefactor for this mission is James. He gives you the boon if you cleared the map of Magnifryers (all 3 of them).
There is no karma boost for this boon.
| Previous Mission: | Mission Category: | Next Mission: |
| James' Missions | IM-07 |
| Missions in Sacrifice | |||||||||
| Missions | 1 | 2 | 3 | 4 | 5 | 6 | 7 | 8 | 9 |
| Persephone | PE-1 | PE-2 | PE-3 | PE-4 | PE-5 | PE-6 | PE-7 | PE-8 | PE-9 |
| James | JA-1 | JA-2 | JA-3 | JA-4 | JA-5 | JA-6 | JA-7 | JA-8 | JA-9 |
| Stratos | ST-1 | ST-2 | ST-3 | ST-4 | ST-5 | ST-6 | ST-7 | ST-8 | ST-9 |
| Pyro | PY-1 | PY-2 | PY-3 | PY-4 | PY-5 | PY-6 | PY-7 | PY-8 | PY-9 |
| Charnel | CH-1 | CH-2 | CH-3 | CH-4 | CH-5 | CH-6 | CH-7 | CH-8 | CH-9 |
| Intermissions | IM-1 | IM-2 | IM-3 | IM-4 | IM-5 | IM-6 | IM-7 | IM-8 | IM-9 |
| Others | Prologue | The Wanderer's Tale | Respite | The Crucible | ||||||||